How to Fix "Virtualized VT-x/EPT Is Not Supported on This Platform" Error on Windows 11
Understanding the VT-x/EPT Error
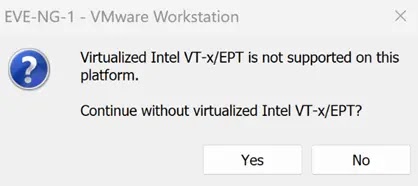
The "Virtualized VT-x/EPT is not supported on this platform" error occurs when attempting to run nested virtualization on Windows 11. This issue typically appears when running virtual machines inside another virtual machine, such as using VMware Workstation, VirtualBox, or Hyper-V within a virtualized environment. Understanding why this error occurs and how to resolve it is essential for developers, IT professionals, and anyone working with virtualization technologies.
VT-x (Intel Virtualization Technology) and EPT (Extended Page Tables) are hardware-assisted virtualization features that enable efficient virtual machine performance. When these technologies aren't properly configured or enabled, nested virtualization fails, preventing you from running VMs within VMs. This article provides practical solutions to fix this common Windows 11 virtualization error.
Common Causes of VT-x/EPT Error
Several factors can trigger the VT-x/EPT error on Windows 11:
- Virtualization not enabled in BIOS/UEFI: Hardware virtualization must be activated at the firmware level
- Hyper-V conflicts: Windows Hyper-V can interfere with other virtualization platforms
- Nested virtualization disabled: The host VM doesn't have nested virtualization enabled
- Windows security features: Core Isolation and Memory Integrity can block virtualization
- Outdated hypervisor software: Running old versions of VMware or VirtualBox
Solution 1: Enable Virtualization in BIOS/UEFI
The first step is ensuring hardware virtualization is enabled in your system's BIOS or UEFI settings:
- Restart your Windows 11 computer
- Press the BIOS key during startup (usually F2, F10, Del, or Esc)
- Navigate to Advanced Settings or CPU Configuration
- Look for Intel VT-x or AMD-V option
- Enable the virtualization technology option
- Save changes and exit BIOS
Important: Different motherboard manufacturers use different BIOS interfaces. Consult your system documentation for specific instructions.
Solution 2: Disable Hyper-V and Windows Features
Windows 11's built-in Hyper-V can conflict with third-party virtualization software. Disable it using these steps:
Via Windows Features:
- Press Windows + R and type
optionalfeatures - Uncheck Hyper-V
- Uncheck Virtual Machine Platform
- Uncheck Windows Hypervisor Platform
- Click OK and restart your computer
Via PowerShell (Administrator):
bcdedit /set hypervisorlaunchtype off
DISM /Online /Disable-Feature /FeatureName:Microsoft-Hyper-V-All
Solution 3: Disable Core Isolation and Memory Integrity
Windows 11's security features can interfere with virtualization:
- Open Settings → Privacy & Security
- Click Windows Security
- Select Device Security
- Click Core Isolation Details
- Turn off Memory Integrity
- Restart your computer
Solution 4: Enable Nested Virtualization (For Running VM inside VM)
If running Windows 11 as a guest VM and trying to run nested virtualization, enable it on the host:
For VMware Workstation:
- Shut down the guest VM
- Edit VM settings
- Go to Processors
- Check Virtualize Intel VT-x/EPT or AMD-V/RVI
- Click OK and start the VM
For Hyper-V (PowerShell as Administrator):
Set-VMProcessor -VMName "YourVMName" -ExposeVirtualizationExtensions $true
For VirtualBox:
- Shut down the VM
- Open VM settings
- Go to System → Acceleration
- Enable Enable Nested VT-x/AMD-V
- Click OK and start the VM
Solution 5: Update Virtualization Software
Ensure you're running the latest version of your virtualization platform:
- VMware Workstation: Update to version 16.0 or higher for full Windows 11 support
- VirtualBox: Version 7.0+ provides better Windows 11 compatibility
- Hyper-V: Keep Windows 11 updated for latest Hyper-V improvements
Verification Steps
After applying fixes, verify virtualization is working:
Check VT-x Status in Windows 11:
- Open Task Manager (Ctrl + Shift + Esc)
- Go to Performance tab
- Select CPU
- Look for "Virtualization: Enabled"
Using Command Prompt:
systeminfo | find "Virtualization"
If virtualization shows as "Enabled," you can now run virtual machines without the VT-x/EPT error.
Conclusion
Fixing the "Virtualized VT-x/EPT is not supported on this platform" error on Windows 11 requires enabling hardware virtualization in BIOS, disabling conflicting Windows features, and properly configuring your virtualization software. By following these solutions systematically, you can resolve nested virtualization issues and run virtual machines successfully. Remember to always backup your data before making BIOS changes and restart your system after applying fixes for changes to take effect.