How to Save PuTTY Output Automatically
Introduction
PuTTY is a popular terminal emulator used to connect to remote servers on Windows. One of its most useful features is the ability to automatically save the output of your sessions. This helps with troubleshooting, keeping logs, or documenting your work.
In this guide, you will learn how to configure PuTTY to save session output automatically. You will also see how to adjust settings like the scrollback buffer to make sure you capture all the information from your sessions.
By the end of this tutorial, you will be able to log all PuTTY sessions effectively, ensuring you never lose important command output or session data.
Configuring PuTTY
To log all your session output in PuTTY, you need to change the default settings. Follow these steps:
Open PuTTY, go to Session > Logging, select All session output, and specify a log file:
D:\Putty Log\&H-&D-&M-&Y-&T.log
Make sure the folder D:\Putty Log exists, otherwise PuTTY will not be able to save the logs.
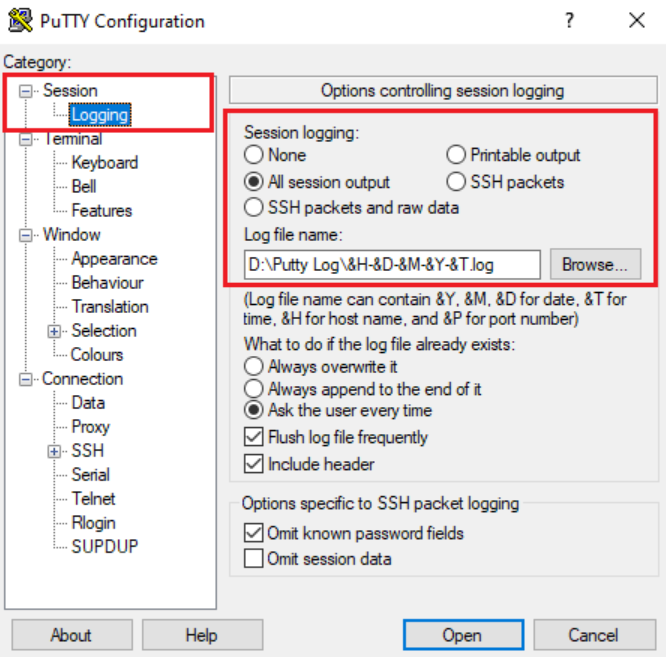
The log file name uses special parameters to make each session unique, for example: &H-&Y&M&D-&T.log. Here’s what each parameter means:
- &H = Hostname of the session
- &Y = Year
- &M = Month
- &D = Day
- &T = Time
Set Lines of Scrollback:
PuTTY keeps a certain number of lines in the scrollback buffer. If your session generates a lot of output, you may only be able to see the last few lines unless you increase the buffer size.
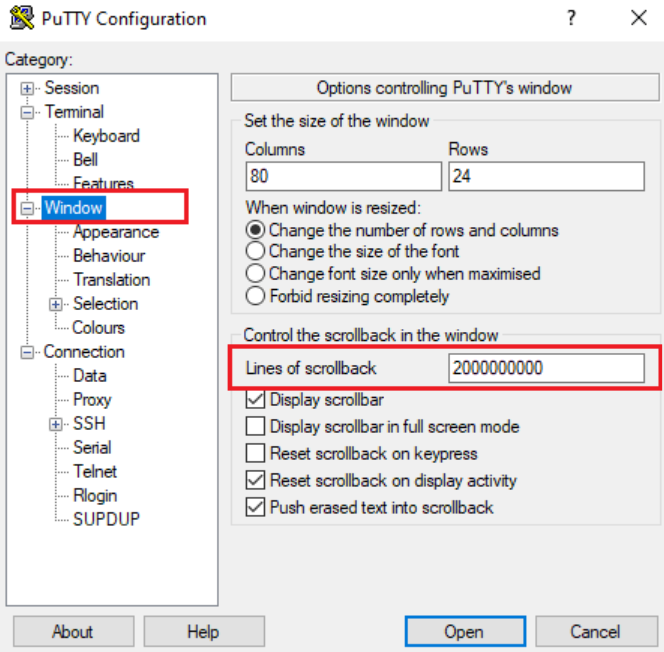
To increase the scrollback buffer, go to the Window category in PuTTY settings and change the Lines of scrollback value. The default is 200 lines, but you can increase it up to 2,147,483,647 lines if needed.
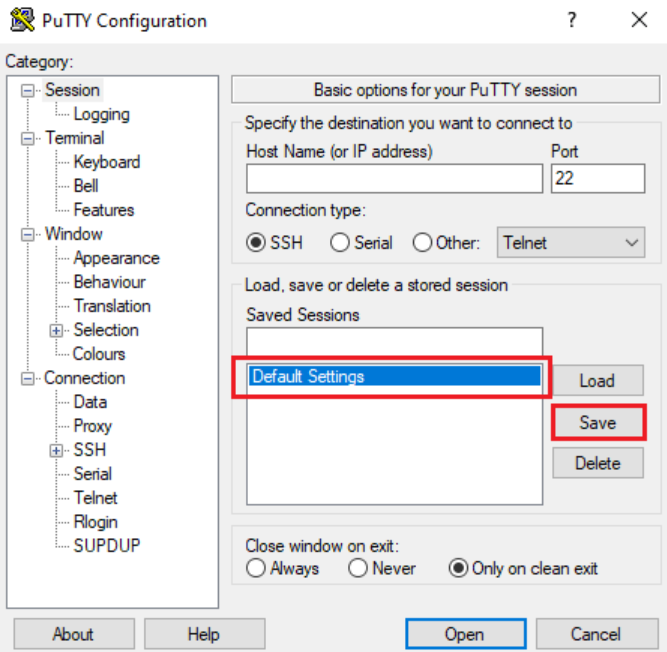
After adjusting the scrollback, save the changes to the Default Settings profile by clicking the Save button in the PuTTY configuration window.
Conclusion
By setting up PuTTY logging and adjusting the scrollback buffer, you can automatically save all session output. This ensures you never lose important terminal information during long or busy sessions.
For more networking tips and guides, visit SwitchFirewall.